Most common troubles with TI–59 calculators are caused probably by their magnetic card readers; this article should help you solve these problems. Below, I've only included repairs that do not require breaking into electronics (without soldering, to be precise). The card readers of the TI–59’s are, to be sure, very solid and reliable, but with time they wear away or simply get dirty. Since the other elements (electronics, keyboard) could go out of order as well, therefore not any card reading problem stands for the card reader damage. Thus, before you disassemble the calculator (it’s always a little bit risky!) – I suggest to try the following:
!! THERE ARE NO SPARE PARTS FOR THESE OLD CALCULATORS !!
It means – if something goes wrong – you can get the spare parts only from another machine. Repairing the damaged parts is mostly either very hard, or impossible at all.
This article was written only for informational purpose. The author takes no responsibility for any consequences of using this information, especially if someone damages his calculator or himself.
You can download, copy, share with friends and print out this article but:
And now… to the subject.
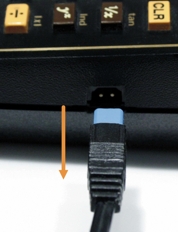
Firstly – disconnect the AC adapter/charger. The electronics of your TI–59 could be irreversibly damaged when working with AC adapter/charger without battery pack inside!
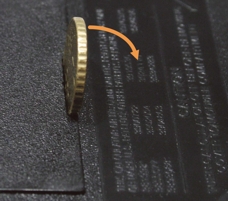
Then lever the battery pack with a small coin (or flat screwdriver) and take it out. If you suspect, that the battery compartment got dirty (Ni–Cd rechargeable batteries are corroded, or even flowed out) – remove the Library Module first, then open the case and try to remove the battery pack. Be careful – the cells and flowed out chemicals are toxic! Follow your local rules of disposal.
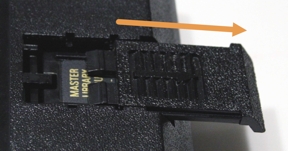
Pull the module cover out. The module itself should drop out free; it’s fixed only with cover and contact springs.
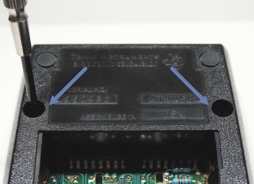
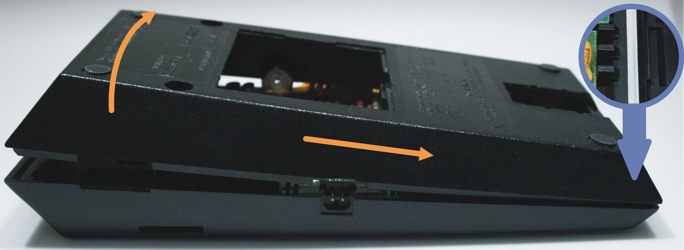
Using Philips screwdriver turn these two screws out.
Raise the case up and simultaneously shift aside, as the arrows show. There are two plastic catches inside – don’t break them.
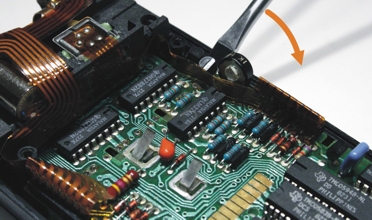
Using Philips screwdriver turn out the four screws holding the main board and drive.
Push the both plastic catches of main board as shown. Do it very gently – they are really easy to damage (break). Note, that the catches don’t hold the main board immediately, but the keyboard module underneath.

Lever the main board with drive (from both sides) with a flat screwdriver and pull them up.
Probably after removing the main board it will be somewhat messy (therefore it’s really not bad idea to notice the keyboard layout in time; anyway – don’t worry! – www.datamath.org/ and wwww.rskey.org/ are always helpful for you).
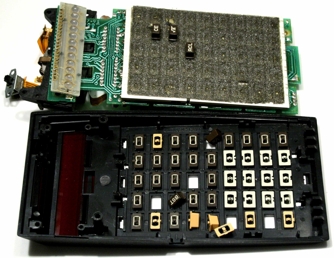
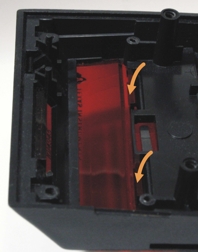
Remove the red display filter pressing both plastic catches with your thumbs as the arrows show.
Now you can clean the case, keys and display filter with some common dish detergent. Additionally you could polish the filter with common dental crème. Don’t polish the gold letters (if they survived up to now) – they will rubbed out!
Try any cleaning liquid first on an invisible place – some stronger detergents could be pretty aggressive!
Sponge is not fixed (glued) to the keyboard module – it should remove freely. Probably it’s very old and will tear. It’s no problem – clean gently the module form the rests of an old sponge and simply lay a new piece on it. Don’t glue the sponge to keyboard module.

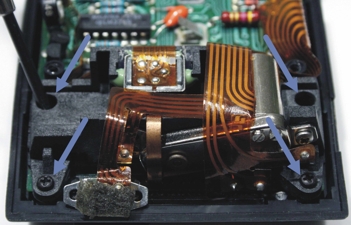
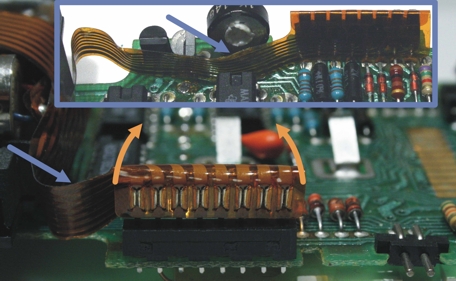
There are two ribbon cables to disconnect. Pull up the connector (best of all – in very small steps, both sides alternately). Notice the correct layout of the bands (blue arrows).
After disconnecting the bands – you can take out and disassemble the drive. Lever the holding spring (as shown) – it should jump out (probably you need a precision pliers or tweezers to set it back). There is NO other way to open the drive. If you try something other – you will harm it probably irreversibly.
There are four things to clean with alcohol or magnetic head cleaning fluid.

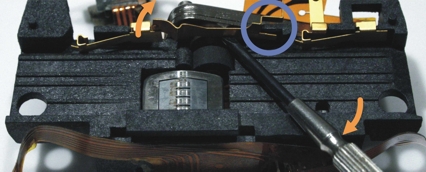
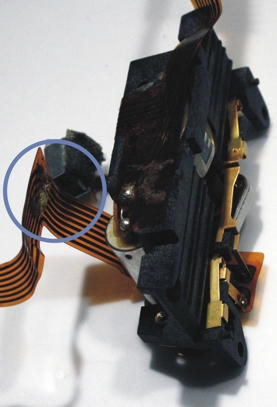
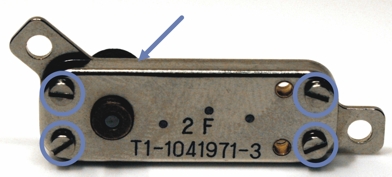
Firstly lever the card sensor switch. It holds at the point marked with blue circle. You don’t need to remove it entirely – it’s enough to make some room to pull the capstan out. It’s reasonable to try to lever this spring in several points.
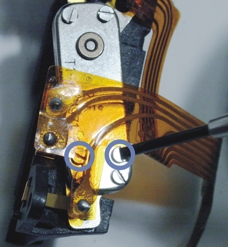
Now detach the ribbon cable as shown (fortunately the glue doesn’t hold too strong).
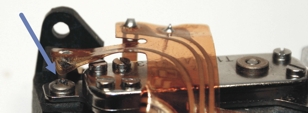
Pull very carefully the ribbon cable up and turn out the main screw holding the gear.
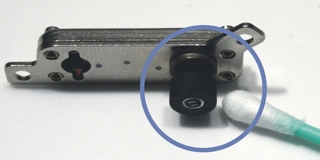
Turn out the two (and only!) screws holding the motor (marked with blue circles). Now you can take the gear out.
Having the gear out of drive – you can thoroughly clean the capstan with alcohol or magnetic head cleaning fluid. It’s essential for correct transport of magnetic cards.
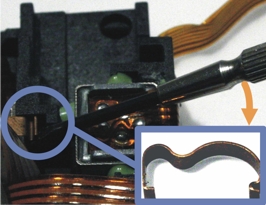
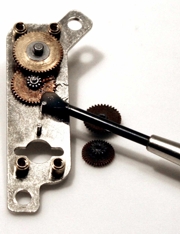
Turn out the four screws and lever a gear cover. If it doesn’t go with your fingers – use the sharp knife (notice the blue arrow) to lever it.
Now you can clean the cogwheels. Do it, best of all, with white spirit and small brush. It’s a good idea to prepare a small piece of plastic foil (cut as shown) and fix on the capstan shaft, to prevent the capstan from grease.

You can put a small drop of lubricant on the capstan’s shaft and some paraffin jelly (or similar grease) on the cogwheels and their shafts. I would suggest to use a sour free medical Vaseline for this purpose. Theoretically it’s possible to take out the last two cogwheels, but it’s very risky, and in fact unnecessary. They can be as well cleaned and greased on their places.
That's all...
If you’ll find mistakes, errors or lacks – simply email me: here – I’ll be grateful for any critical advices.